Managing Your UI

Organizing your workspace by making tabs visible or invisible

Hiding, Showing and Docking UI Elements

A Datamine eLearning course is available that covers functions described in this topic. Contact your local Datamine office for more details.


Control bars (whether free-floating or docked) can be managed using the context menu, activated with a right-click on the appropriate Control Bar. Note that this context menu does not appear when right-clicking a Data Window tab.

This context menu shows the following options:

Field details:

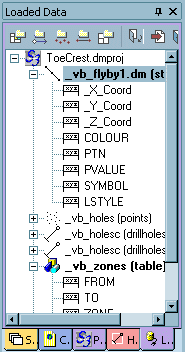
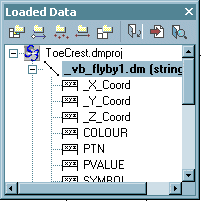
Floating: select this option to detach the current tab from the main group and show its contents in a standalone, freely modifiable window, e.g.:


when 'floated', becomes:


Docking: if a project bar is already floating, right-clicking its title bar will allow you to select the Docking option. The bar will then be returned to its default pane.

Auto Hide: this option allows you to dynamically hide or show any project bar using mouse movement. You can elect to auto-hide a group of bars, not a single bar. Selecting any tab in a group (providing it is already docked) will allow you to choose Auto Hide. When a group is auto-hidden, a menu bar will appear on the side of the screen nearest the original group's position. For example, if the Project Files tab is auto-hidden, all visible tabs in the group (including Sheets, Customization, Loaded Data and Holes) will be represented on the left of the screen by the following image (or similar, depending on your application's 'look and feel' settings):

Moving your cursor over one of the available icons will display the relevant project bar. When the mouse moves away from the project bar, it is automatically hidden.

Hide: to remove a tab from view (without affecting any loaded data), you can select this option.

You can re-enable control bars using the Home ribbon's Show menu.

  openbook.gif (910 bytes)   Related Topics


Organizing your workspace
Control bars overview

Output window overview